
Developing Bootstrap Template
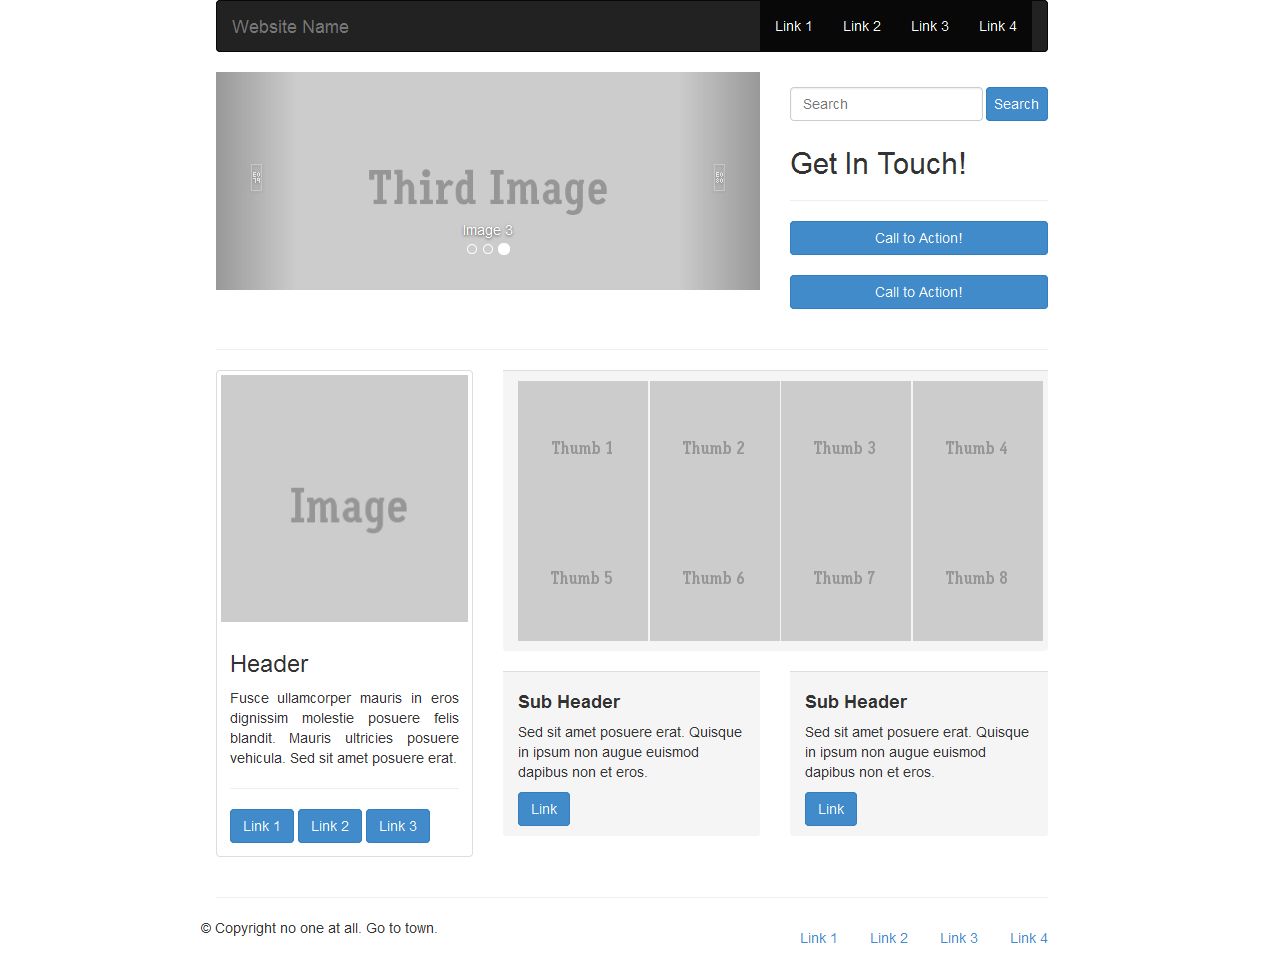
In this section, we are going to create Bootstrap Template using bootstrap elements. Click on this image to view this Template.
Step 1: Creating Empty Template
Step 1.1: Create a new html file in your favorite html editor.
Step 1.2: Add css files and javascripts into your html file.
<!DOCTYPE html>
<html lang="en">
  <head>
    <meta charset="utf-8">
    <meta http-equiv="X-UA-Compatible" content="IE=edge">
    <meta name="viewport" content="width=device-width, initial-scale=1">
    <meta name="description" content="">
    <meta name="author" content="">

    <title>Grid Template for Bootstrap</title>

    <!-- Bootstrap core CSS -->
    <link href="dist/css/bootstrap.min.css" rel="stylesheet">
	<link href="dist/css/bootstrap-theme.min.css" rel="stylesheet">
    </head>

  <body>

  <script src="js/vendor/jquery.min.js"></script>
  <script src="js/bootstrap.min.js"></script>
  </body>
</html>
Step 2: Creating Layout
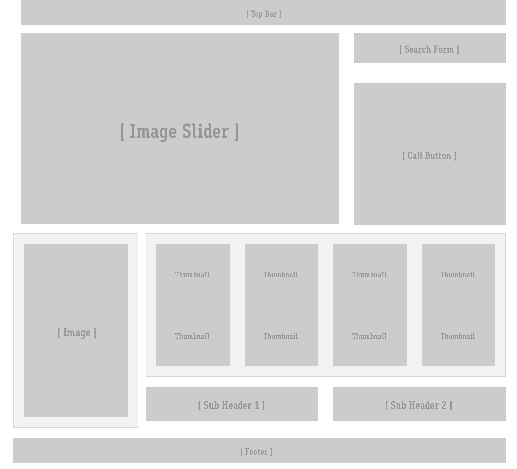
In this step, we are going to design the basic layout of our template. Basically we are just going to decide what to use in our template and make a layout of it using grids and bootstrap elements.
I assume now you have a clear understanding of how to use Bootstrap grids. The elements I decided to include in this template are,
- Navbar
- Carousel
- Search From and Call Button
- Thumbnails and its Description
- Footer
After completing the layout design, our template will now look like this,
Step 3: Finishing the Template
In this step, we are going to complete the design of our template.
Now that we have our layout in hand, all we need to do is copy the code of the Boostrap and place it in the appropriate places. Click this link for Bootsrap element tutorials,
After adding the necessary elements, our template will now look like this,